|
“I long for the bulbs to arrive, for the early autumn chores are melancholy, but the planting of bulbs is the work of hope and always thrilling.”
— May Sarton (1912-1995, New England poet, author, and feminist)
|
The Long Awaited Bulbs of Fall are Shipping Now!
|
|
|
While we’re still waiting on two late-dug varieties, our October shipping season has begun! As usual for fall bulbs, we’ll begin with orders going to the coldest zones and with the orders placed earliest, noting any requests to avoid particular dates due to travel or other concerns. If we have your order now, you can expect it to arrive by Halloween (unless you asked us to send it in early November.) We’ll send an email with tracking information when the order leaves here, letting you know if it’s going through US mail or UPS, and giving you a sense of what date to expect their delivery.
While waiting for your box to arrive, don’t be too concerned about impending frost or scattered snow flurries! It will be fine to plant your bulbs as long as the ground itself hasn’t frozen, and that doesn’t happen immediately. Here in zone 6a we typically have a hard frost in October and are often still out planting bulbs after Thanksgiving - while we may get cold fingers and toes, the bulbs themselves do just as well as ones planted earlier. If you’re particularly worried, you can pre-dig the ground and then cover it with mulch to further postpone its freezing; just remember to remove the mulch in early spring so that the warm sunlight can reach the soil directly.
|
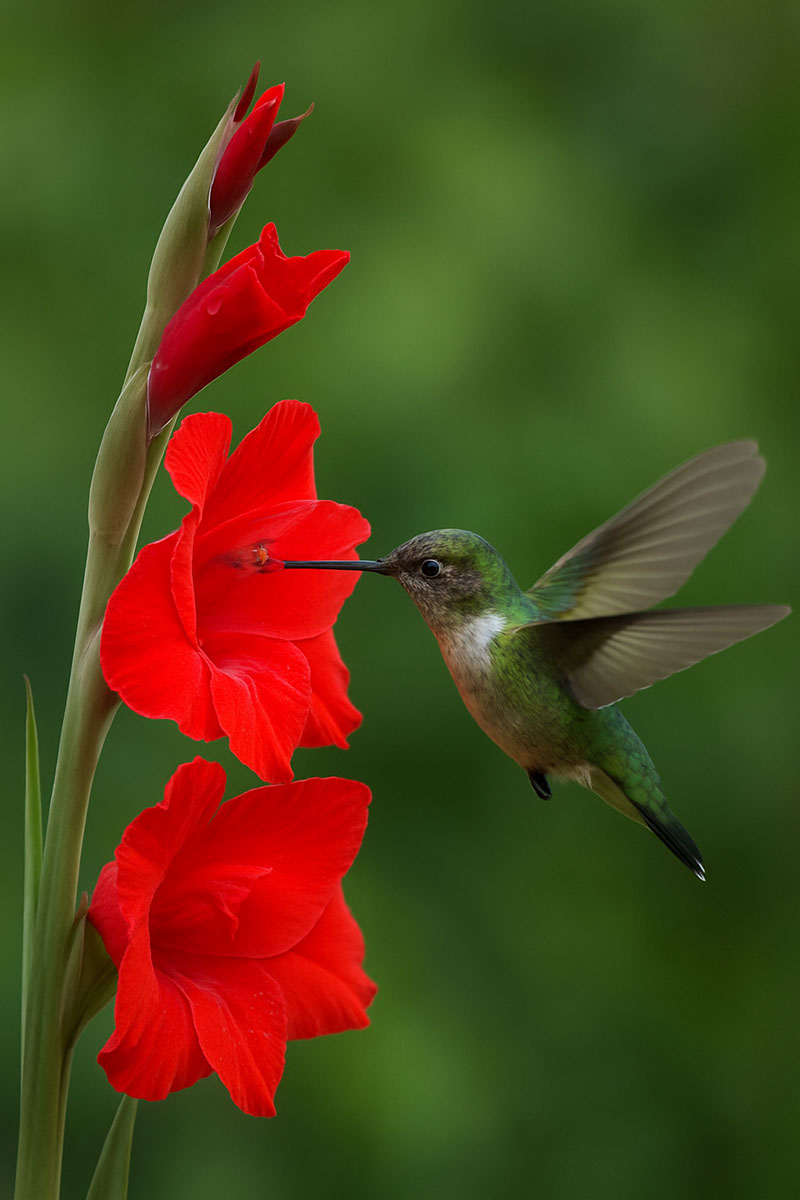
Gladiolus Bonus: Hummingbirds
|
|
|
“A glad lover for over 50 years,” our good customer Margaret Kwitek of Maribel, Wisconsin, says if you don’t have glads blooming in your garden this summer, you’re missing more than flowers:
“Oh my goodness, your pictures of glads are wonderful! As for any ‘glad haters,’ all they have to do is put a comfy chair in the garden when the glads are in their glory. Sit quietly and enjoy the show of hummingbirds. They seem to know when you relax and feel quite comfortable coming in to those lovely flowers. I‘ve even had them come to flowers I had cut and was bringing into the house. I’m never disappointed when I need a lift. I ALWAYS have glads if for no other reason. Who would fail to be delighted?”
|
The Phones are Ringing…
|
|
|
We changed our phone system last week and it has many new features to help us serve you better. Thanks for your patience as we learn all about it. And for understanding that once we begin shipping we’ll only be checking messages periodically, so please leave any information you think we’d need to address your concern. If you’d rather text than leave a voice mail, you’re now able to do that using our regular phone number. We’re looking forward to hearing from you one way or another!
|
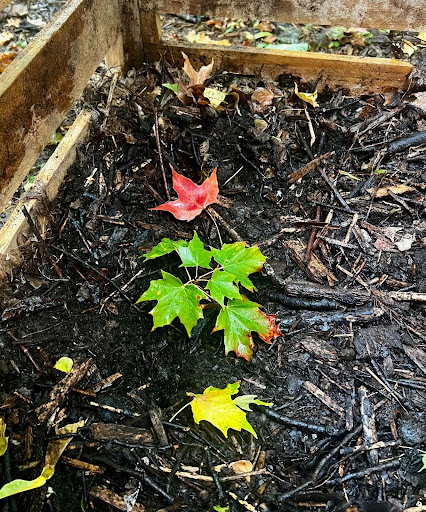
Leaf Mold and Compost for Soil Structure and Plant Food
|
|
|
“Leafmould is one of the few things that money cannot buy..” Monty Don, author of The Complete Gardener and host of the BBC’s “Gardener’s World”.
Leaves are beginning to change to the beautiful colors of autumn and will soon cover our green lawns and flower-filled beds. Instead of bagging those leaves and sending them away, they can enrich the soil in your garden rather quickly.
Wildlife benefits from flowers that are left over the winter - nesting and feeding on the leaves, stems, and seeds. In addition to leaving flowers for wildlife, a layer of fallen leaves among the seed-topped flowers from summer provides an extra blanket over plants’ crowns and roots while creating a cover for invertebrates and small animals.
Once some leaves are put aside for winter plant and animal protection, mowing leaves to create smaller pieces is an effective way of speeding up the process and reducing the amount of space needed. If you have a mower with a bag, the grass and leaf clippings can go from the bag into a bay (or even a pile in a corner of your garden) to begin the process of breaking down to fungi. Because the decomposition process is fungal, moisture is needed instead of heat. In a dry climate, occasionally spraying with water will speed up the process.
Any leaves that fall on hardscapes or extra leaves that will create a mat too thick for those early spring bulbs can be blown or raked onto the lawn or flat space for mowing. After mowing, some of the chopped leaf pieces can be blown back into your beds, leaving some in the grass to become rich organic matter over winter. By spring, the mulched leaves will be well on their way to becoming food for your soil.
Thick leaves, like oak or magnolia leaves, will take longer to break down, but most will be completely brown and broken down ready to be sieved and used by next October. Once sieved, the compost can be stored to be used as a light, but rich potting soil that is good for root growth and improves water retention. The leaf mold is acidic and is beneficial to many of the bulbs that are planted in the fall, as well as azaleas, rhododendrons, blueberries, and other ericaceous plants. Evergreen leaves and needles will take longer, but will add to the acidity. Avoid using leaves from a different ecosystem and leaves from an area that may have pollutants (a roadside, for example).
If you’d like to learn more about various forms of composting, Monty Don covers several ways to use organic matter from your garden to improve your soil and feed your plants in “The Complete Gardener” (2003) by Monty Don.
|
Easy Fall Clean-Up Protects Your Iris and Peonies
|
|
|
We say this every fall because it’s just so darn easy and important: For more flowers and healthier plants, give your peonies and iris a simple fall clean-up.
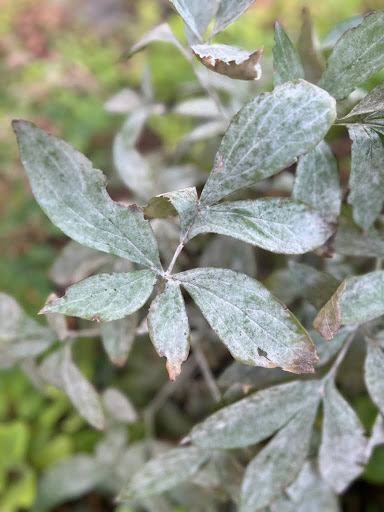
PEONIES – Although relatively care-free, peonies can be afflicted by powdery mildew (pictured above) and other fungal diseases. Powdery mildew seems to be especially prevalent this year.
To prevent spores from overwintering, cut stems as close to the ground as possible, carefully bagging everything as you go. It’s best to do this earlier rather than later, before the leaves get dry and crumbly – or even as early as August if the foliage has been hard hit.
Disinfect your tools with rubbing alcohol or bleach between plants to avoid spreading disease. Dispose of all clippings in the trash. Do not compost!
If you’ve tried this and still have problems, you may also want to try a fungicidal spray. Mancozeb is one good choice. Drench the ground around the base of the peonies after your fall clean-up, and then spray in spring as soon as sprouts emerge and again every 7-10 days until bloom-time.
IRIS – Fall is also the best time to control iris borers which are a common pest in gardens east of the Rockies.
Borers hatch in spring from eggs laid in the fall on iris leaves and anything similar that’s nearby. To destroy them, simply (a) wait until a hard frost kills the adult moths and then (b) cut back all leaves to a couple of inches and (c) remove, bag, and throw the clippings in the trash along with any nearby debris or mulch. Do not compost!
Fungal diseases such as leaf spot may also afflict iris, and fungicides such as mancozeb can help control them, too. Spray after fall clean-up and once again in early spring.
Healthier plants look better and bloom more – so get out there and give yours a boost!
|
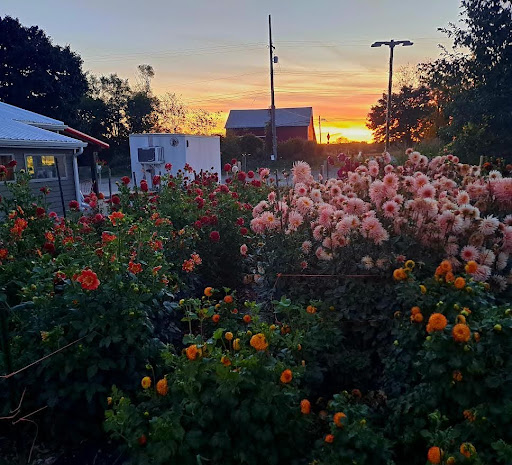
Digging Up and Storing Dahlias
|
|
|
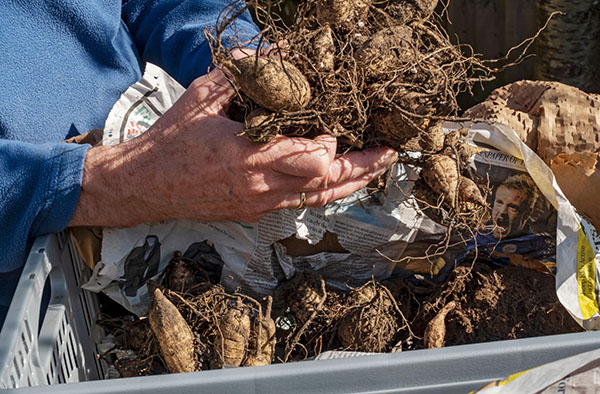
In zones 7 and colder, if you want to save tubers for re-planting the next spring, wait a week or so after the foliage has been “blackened” by frost, to allow tubers to harden and fully mature. The soil will generally protect them from freezing. Then cut the stalks off a few inches above ground level. You’ll find that the tubers you planted in early summer will have increased into much larger clumps, so be careful when digging — start at least a foot away from the stalks. Tag each clump with its name, wash off all soil, and allow it to dry upside down in a cool, dry place for a day or two, no more.
Divide the clumps with a sturdy knife in fall or spring. Be sure a piece of the “crown” — the thickened area where the stem meets the tuber — remains attached to every clump, because the eyes (often more visible in fall) are located there. You may want to dust cuts with a fungicide such as garden sulfur. At the least allow cuts to air dry for a full day before storage.
Store in plastic grocery bags, in plastic garbage bags inside boxes, or in covered plastic storage boxes to help keep the tubers from dehydrating. Pack in coarse vermiculite, peat moss, wood-shavings, or something similar. Store in a cool, dry, dark place, ideally at 40-45° F. Check every now and then. Allow excess moisture to escape (look for condensation) or sprinkle some water on tubers if they seem to be shriveling.
Or here’s an easy way recommended by Marian and Bernard Mandella and Richard Peters in the Bulletin of the American Dahlia Society. “Tear off a sheet of plastic wrap 20 or more inches long and lay it flat on a level surface. Place a [divided, dusted, and dried] tuber on one end and roll the plastic wrap over one complete turn. Lay another alongside and roll again. Be certain that no tuber is touching another. . . . You may wrap up to five tubers or so per package, but in the last 5-7 inches, fold over the side portions of the plastic wrap and continue to roll to completion. Fasten with a piece of masking tape that is labeled with the cultivar’s name. . . . There is essentially no loss from shriveling or drying.” One local Michigan gardener uses this technique for her collection of over 200 dahlias with great success.
Some of our customers who grow dahlias in pots just bring them inside and let them dry out and over-winter right in their pots. Others grow them in 5-gallon or even 1-gallon black plastic nursery pots that they bury in the garden and then dig up and store in the basement through winter. You may want to experiment with these extra-easy storage methods, too!
|
To Make Sure Our Newsletter Reaches You Safely . . .
|
|
|
Please add newsletter@oldhousegardens.com to your email address book or safe/approved list today.
|
To Unsubscribe
|
|
|
We hope you enjoy our monthly Gazette, but if not UNSUBSCRIBE here and we’ll drop you from our list immediately.
|
|